

Welcome to Perfectly Fine Dinner Party Club, a cooking and hosting column from Libby Watson, who likes to throw dinner parties but is normal about it.
You have surely noticed that a few months have passed without a Perfectly Fine Dinner Party Club Post From Libby Watson At Defector. Your friends have been waiting for you to host your next event, and wondering what the holdup is. I will admit to you that I did throw a Fourth of July dinner party that was meant to be the next edition of this column, but here’s the deal: It was not quite "perfectly fine" enough. It was inadequately fine.
I tried making Samin Nosrat’s braised pork with chiles, and it was good but I put too much of my frozen Kenji chili paste in, so it tasted a bit … pasty? Like old chili paste from the freezer, for some reason? I also tried making corn tortillas for the first time in my life, on a day that I was also making the rest of dinner, including a cherry pie, and hosting a two-hour charity stream for Famous Podcaster Hayes Davenport in my apartment (the timing of which meant the cherry pie was a touch undercooked, too). The tortillas were not great: Dry, cracked, not pliable. We had some backups from the store and a guest helped me rescue mine a bit, so everything was OK, but it meant the dinner was logged in my memory as Not A Success, even though we all had [most British voice you’ve ever heard] such a splendid time.
So I wasted the summer sitting in my failure, thinking about how to explain it. I sat, and I sat, and then I had to stand and walk around a lot because I had pretty severe sciatica until August, when it became merely tolerable. Then, at the end of the month, I said: No more. It is time to make dinner for friends again. And I was not about to fuck around making subpar tortillas. I needed the recipe, the slam dunk to restore my confidence, and I knew exactly which one it would be.
The New York Times describes this recipe for bo ssam, a Korean slow-cooked pork—roasted and pulled apart in this instance, as opposed to the more traditional boiling-and-slicing—as "a recipe to win the dinner party sweepstakes, and at very low stakes." Which is an annoying way of using "stakes" twice in the same sentence with slightly different meanings, but they are right: It is easy and always unbelievably impressive. People cannot believe how good it is, and thus they think you must have spent hours in the kitchen for it. They are wrong, but you can let them think that a little bit. This meal is one I make when I have a lot of people to feed, and you can’t risk it being just OK. It is for situations where you really just need to fucking whack it out of the park.
The other two recipes we’ll be using are also from the Times, and along with the previous one, they’re gift links so you don’t have to be a subscriber: Chinese smashed cucumber salad, and some classic English scones for dessert, one of the few bits of British cuisine I’ll unequivocally defend.
First, my favorite part: going to the store. Here is your shopping list:
- Bone-in pork shoulder
- Brown sugar
- Bibb/butter lettuce (or any sort of soft, round, not-too-curly-or-crisp lettuce; mine is from the farmers market but get a whole one)
- Calrose or other medium-grain rice
- Gochujang
- Ssamjang (see below for details)
- Rice vinegar
- Toasted sesame oil
- Two cucumbers
- Big ginger knob (AND I’M NOT TALKING ABOUT PRINCE HARRY!!!)
- Bunch o’ scallions
- Mint or cilantro
- Neutral oil like grapeseed, avocado, or canola
- Kimchi
- One thing of strawberries
- Mascarpone
- Heavy cream
- Something nice from the checkout aisle, like maybe a Reese’s Big Cup
I am assuming you have salt (the kind I told you about), white sugar, and red pepper flakes.
An important note on serving sizes and selecting your pork: I have tried this recipe with smaller, boneless pork shoulders from Whole Foods, and with huge, 10-pound bone-in fuckers from the regular store, and I believe that the taste does benefit from making a larger piece. I don’t know if it’s just the bone, or something about the juicifying properties of increasing the amount of meat you cook at once, but even if you are having fewer people, I would recommend trying to find at least a five-pounder with a bone. If you cook a smaller one and it works, please email me! I want to know what I did differently.
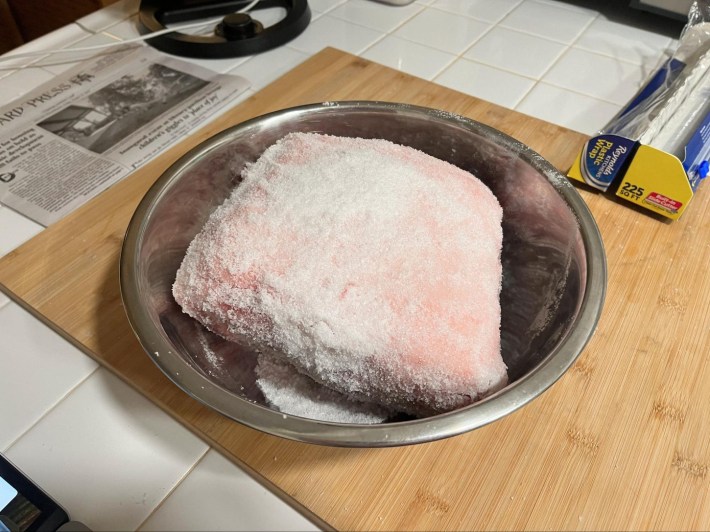
The night before, you will apply an implausibly large-seeming amount of salt and sugar to your pork. My pork was about 6 pounds, so I guessed how much to reduce the amount given in the recipe, which is for an 8–10-pound shoulder. If it has a really large fat cap you can trim some off—contrary to popular belief, a big fat cap largely doesn’t affect the internal tenderness of a big piece of meat, according to Amazing Ribs—but keep it if you like sucking on that fat. Pat it all over as much as you can, making sure to cover every surface, and put it in a bowl in the fridge. Here is what mine looked like:
The next day, preheat your oven to 300. For an 8–10-pound piece, the recipe says it’ll take about six hours, and you can rest it for up to an hour before you serve. That’s roughly 35-45 minutes per pound of meat, so adjust for your meat size. Err on the side of giving yourself more time. Put the meat in a roasting tin (I used a 13-by-9 baking pan), or one of those big disposable foil ones if you have a big boy.
The recipe calls for basting hourly with pan juices, which I did maybe every two hours. Here is what it looked like after two hours in the oven:
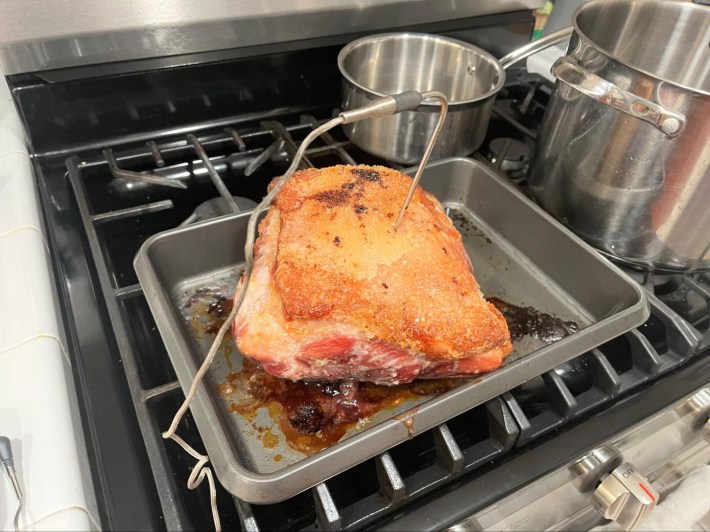
You can see that I cheated a bit by using a barbecue thermometer, which I bought when I got really into smoking meat during the pandemic. It’s great for smoking because it has two probes, one for the grill and one for the meat, and a remote alarm that will beep if the temperature is too high or low. I would take a nap with my little beeper, which would wake me up if the grill needed more charcoal. I no longer have my own grill (would you smoke a rack of ribs on a shared apartment building grill that few people seem to use? Sound off in the comments!) but I use the meat probe for things like this, to take any guesswork out of the process.
You want the internal temperature to hit around 200 degrees, at which point all the connective tissue will have melted and turned soft and nice. But you certainly don’t need the thermometer for this. The pork will be done when it’s both A) cooked for about as long as it needs, and B) jiggly and extremely fork-tender when you get it out. Mine was barely holding together when I transferred it out of the pan with my meat claws. This is what it looked like at that point:

But we are getting ahead of ourselves! We need to make the sauces, which are really important. Make these at any time while the pork is cooking.
The ssamjang sauce is utterly incredible. I make a batch of it and keep it in the fridge for basically any meal. If you make rice, a vegetable, and a protein, you basically don’t have to do anything to any of it except put this sauce on it. Gochujang is pretty widely available these days, but ssamjang is a little harder to find if you don’t have a Korean market near you, although you can order it online. If you don’t want to do that, you could make a different sauce just with the gochujang, but I will tell you the ssamjang is worth it. I usually use rice vinegar instead of sherry vinegar because it is cheaper.
The ginger scallion sauce remains a slight mystery to me. First, the amount of ginger it calls for is astonishing—HALF A CUP of minced ginger, which, to me, is like, I don’t know, two whole normal pieces of ginger? I didn’t use that much, because peeling ginger is one of the worst tasks in the kitchen. (From now on I will just waste slightly more ginger instead of frowning and going at it with a spoon for ages). I decided to try microplaning it instead of mincing, and I think that was a mistake, because the ginger flavor was incredibly strong. Don’t do that, but do cut your scallions nice and thin. You can soak them briefly in ice water if they’re a bit limp.
I decided to serve an additional side, and went with a Chinese smashed cucumber salad. The recipe is pretty easy: Cut a couple cucumbers into four-inch pieces, then smash them with the side of your knife and your palm. You gotta smash pretty hard, so please be careful while you do this! You could probably use something else thin and flat if you’re afraid of the knife like I am. I found that the seeds did not entirely separate like the recipe said, so I just discarded whatever came away easily and left the rest in. Slice them into bite-size pieces, toss with a teaspoon of salt and two of sugar, and let them drain into a bowl in the fridge. Mine looked like this.
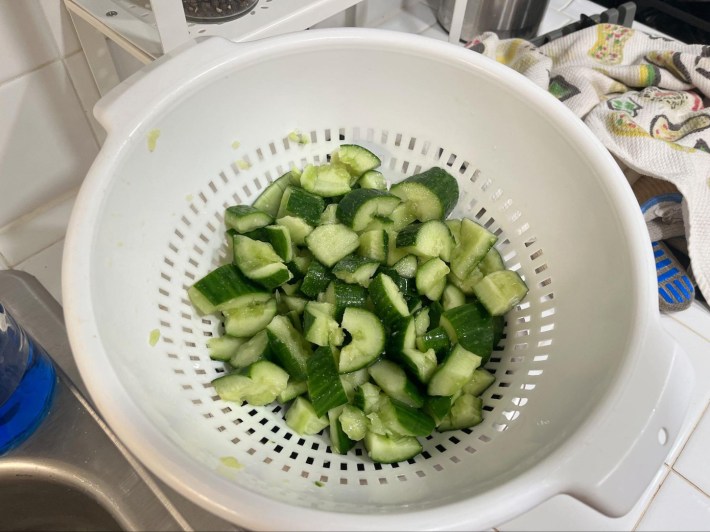
I tossed and squeezed them a couple times, but didn’t bother to do the pressing part, and it was still delicious; we ate the whole thing. And I used mint instead of cilantro because I do not like cilantro.
The last important thing is rice. I use calrose rice, but any medium grain rice will do. I always make rice in my instant pot, with a ratio of one cup of rice (well rinsed) to slightly more than one cup of water, and half a teaspoon of salt; I doubled that recipe to serve seven. Cook for six minutes on high and leave yourself plenty of time to let it release naturally while you do everything else. It was perfect! But however you normally make a pot of rice will work here.
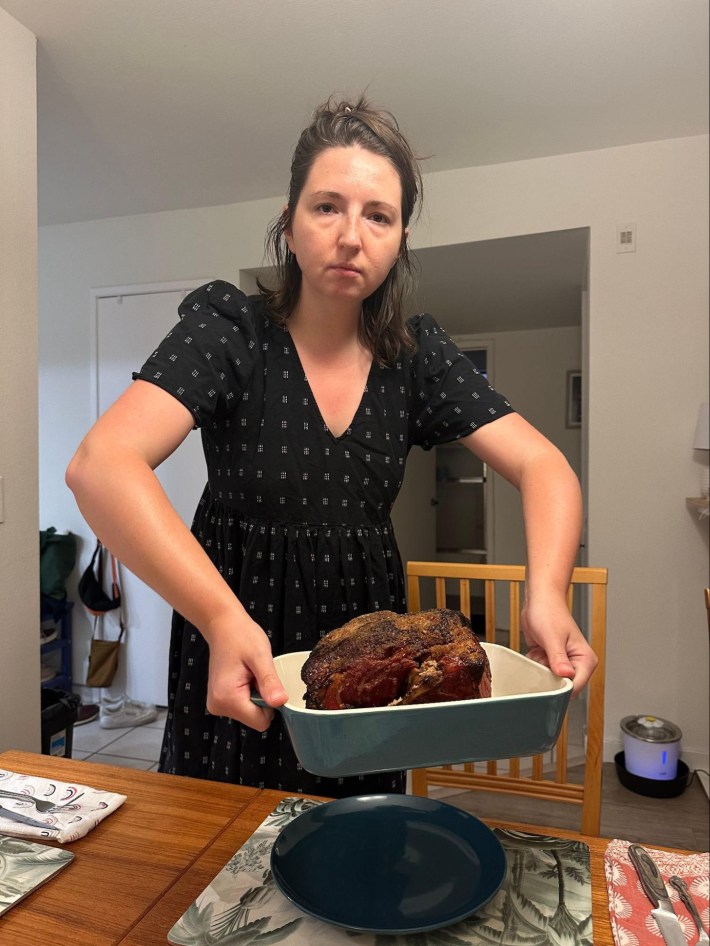
When you are almost ready and the pork is done, turn the oven up to 500 and pat seven tablespoons of brown sugar and yet another tablespoon of salt all over the pork. This is sort of hard if it’s still hot, and I didn't try especially hard at that part, just sort of patting it over the top with a spatula. Sorry! Sue me! At this point I brought out the meat to show it to everyone and get some “oohs” and “ahhs” before shredding. My friend took this photo of me proving that I do not know how to arrange my face for photographs at short notice.
Shred the meat into a big serving dish. I have those plastic meat claw things but forks will work just fine, or tongs used with enough conviction.
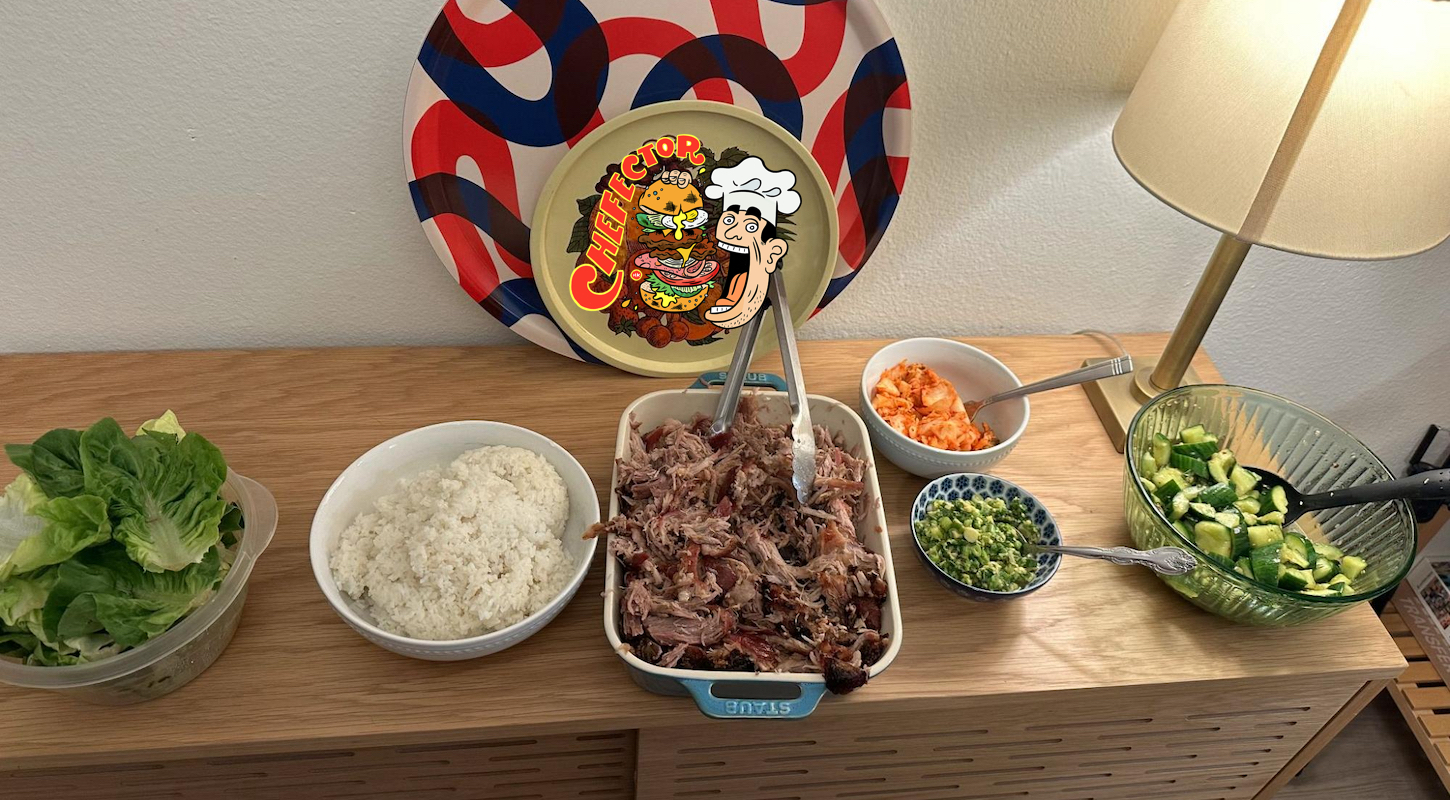
And we’re ready to eat! Here is my typically terrible photo of the spread. Note how I had run out of nice bowls so I used a Tupperware container for the lettuce. Martha Stewart is sobbing somewhere and she doesn’t know why.

Let your guests take turns assembling lettuce wraps with rice, pork, kimchi, and sauces. Expect them to come back for another plate or two.
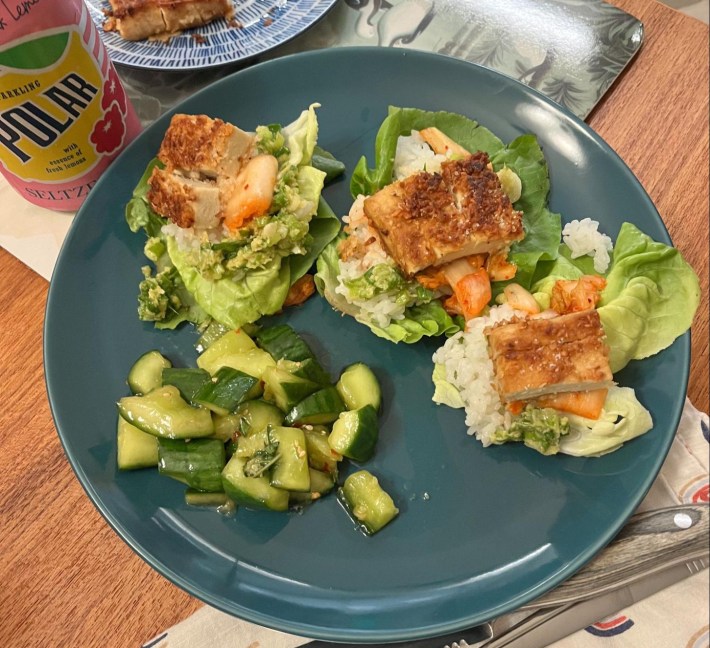
One of my guests was vegetarian, and I had some leftover tofu in the fridge, so I soaked it briefly in soy sauce, dredged it with coconut and cornstarch, and fried it up for 10 minutes or so. I did not get a picture of anyone’s porked plate but I did get a picture of their vegetarian one, and look how darling the wraps are.
Fans of the column will know by now that my favorite trick is to bake a dessert after dinner, in a way that either impresses or slightly exhausts the guests, who thought they were almost free to leave. However, I do think I hit it out of the park with this dessert: Juicy strawberries, whipped mascarpone cream, and quick homemade scones, hot out of the oven.
Wash and chop a pound of strawberries before dinner, into similar-size pieces. After dinner (or even beforehand) you’ll sprinkle them with the juice of half a lemon and about a tablespoon of sugar, which is called maceration. For a bit of extra razzle-dazzle, I used some vanilla sugar, a trick my mum taught me—anytime you scrape the seeds from a vanilla pod in a recipe, don’t throw the pod away! Put it in a little container (I use the glass container the pod comes in from Whole Foods) and fill it with sugar. Over time the sugar will become infused with vanilla flavor.
I pre-whipped most of a pint of heavy cream before dinner, but it was weepy and sad in the fridge by the time I was making dessert, and it didn’t matter. I dumped about four ounces of mascarpone into a bowl, whipped it a bit with an electric whisk, then added the semi-whipped cream and whipped it in until it was smooth and beautiful. Add sugar a tablespoon at a time to taste (and you could add a drop of vanilla extract if you don’t have Mum’s Vanilla Sugar).
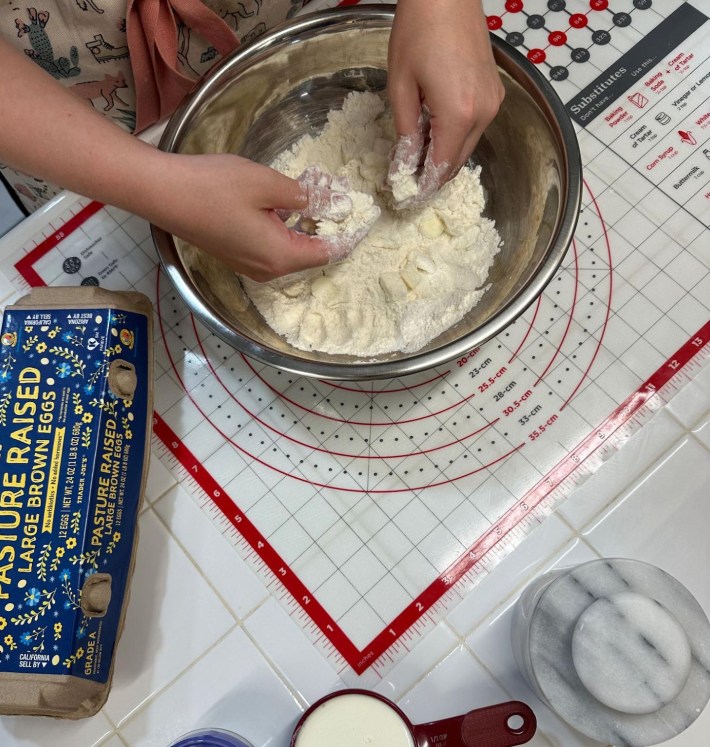
For the scones, I had also mixed the dry ingredients in a container and diced the butter earlier that day. (The recipe calls for cake flour but if you use all purpose flour they will still be great.) That way, all I had to do after dinner was rub the butter into the mix, add the egg and heavy cream, and roll it out, in front of my politely impressed guests.
Usually I double this recipe, and I wish I had done that here, because these scones are so good. Err on the side of adding a bit less cream and feel how sticky it is; be generous with the flour on your rolling surface. Roll out the dough, cut out scones with a biscuit cutter or glass, and feel free to reroll/shape the scraps until you have used the whole lot and you have enough for everyone. Rub a tiny amount of heavy cream on top of the scones and sprinkle with a little sugar, and bake it at 450 degrees (high-seeming but correct) for about 10 minutes, or until the tops are golden and the bottoms are brown.
Each person gets one scone, a huge blob of the whipped mascarpone, and a pile of juicy strawberries. (I split my portion with my husband, because I always misjudge portions for dessert and run out.) Add a little mint and/or basil, and you are set.

Oughhh. I could eat this every night for the rest of my life. If you don’t want to go to as much fuss, get some canned biscuits from the store; you could also just do whipped cream without mascarpone, or vanilla ice cream.
If you make this dinner, I beg you to email me and tell me what you did, anything you changed, and how it went over with guests. Next month, we might try and branch out a little bit again. Hell, maybe I’ll try tortillas again. For now, let’s celebrate one of life’s great joys: sticking to what works. And nothing works like a big hunk of salty-sweet pork and some goddamned strawberries in summer.